As many readers already know I’m maintaing the open source projects FAKE and Paket. These projects are used in many companies and open source projects to make continuous integration work on .NET and mono.
In this article series I want to highlight some of the more unsual use cases. Today I want to start and highlight the first 6 amazing projects.
FsReveal
“FsReveal allows you to write beautiful slides in Markdown and brings C# and F# to the reveal.js web presentation framework.” [project site]
FsReveal uses Paket’s GitHub file dependencies feature to download reveal.js:
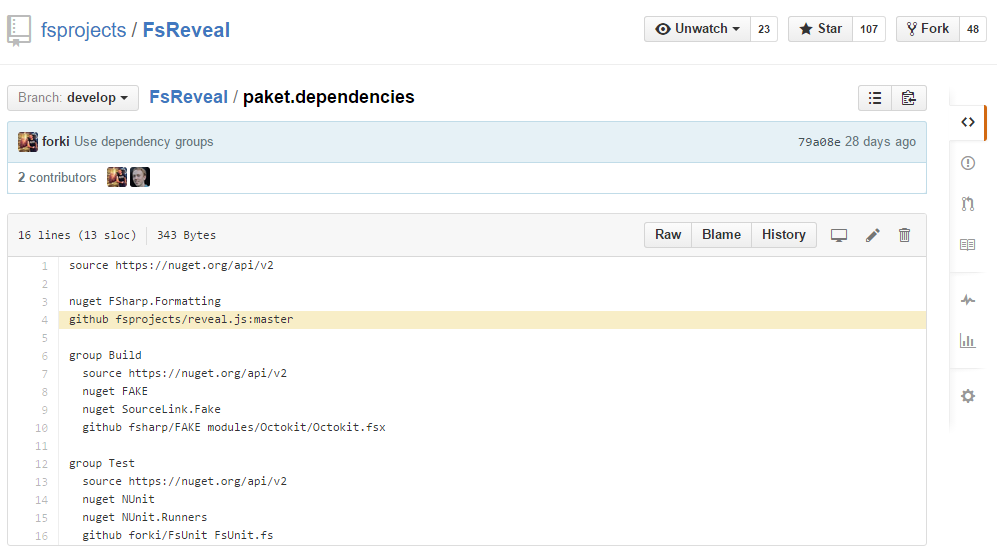
It also uses a FAKE build script which converts Markdown files to html slides (via FSharp.Formatting) and runs these slides in a suave.io web server. FAKE’s file system watcher + suave’s socket implementation even allows you to edit your slides with automatic preview:

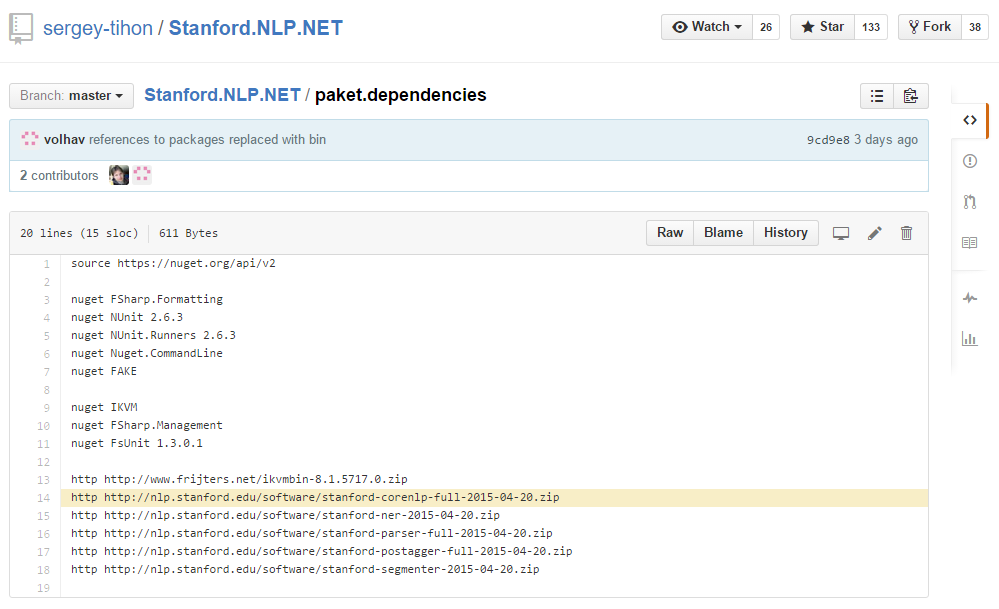
Stanford.NLP.NET
“Stanford.NLP for .NET is a port of Stanford NLP distributions to .NET.
This project contains build scripts that recompile Stanford NLP .jar packages to .NET assemblies using IKVM.NET, tests that help to be sure that recompiled packages are workable and Stanford.NLP for .NET documentation site that hosts samples for all packages. All recompiled packages are available on NuGet.” [project site]
This project downloads .jar packages via Paket’s HTTP dependencies feature, recompiles everything to .NET via IKVM.NET in a FAKE build script and republishes it on NuGet. Automatic Java to .NET compilation – how cool is that?
Paket.VisualStudio
“Manage your Paket dependencies from Visual Studio!” [project site]
Paket.VisualStudio is a VisualStudio addin that you can download from Microsoft’s VisualStudio gallery. Unfortunately even in 2015 Microsoft doesn’t provide an API for automating the upload to its gallery. Therefore Paket.VisualStudio uses Paket’s NuGet dependencies feature to download canopy and Selenium:

It then uses canopy + Selenium in a FAKE script to upload the addin via browser automation:

Ionide-F#
“It’s part of Ionide plugin suite. F# IDE-like possibilities in Atom editor” [project site]
Ionide is an Atom plugin written in F#. It’s using Paket and FAKE to automate the build and release process.
First it uses FunScript to transpile F# to Javascript and then automates npm to resolve Javascript dependencies and apm to upload the plugin to the Atom gallery.
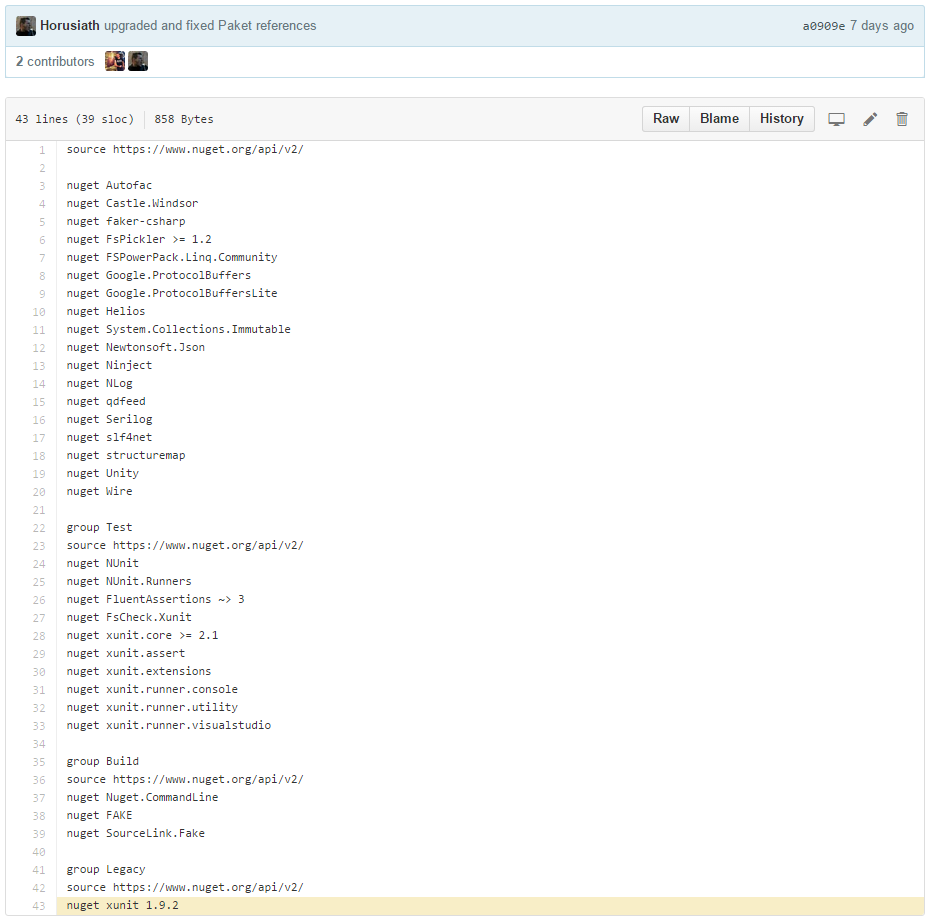
Akka.Net
“Akka.NET is a community-driven port of the popular Java/Scala framework Akka to .NET.” [project site]
Akka.Net is a big (mainly C#) open source project that uses FAKE and Paket. One interesting observation is that it needs to create different xUnit addins and therefore uses Paket’s groups feature to maintain the xUnit versions.
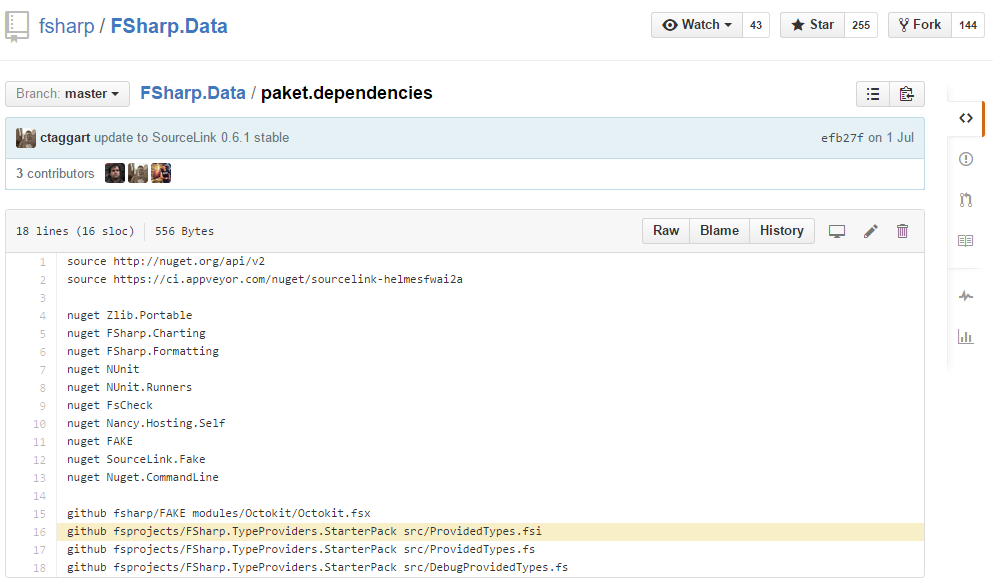
FSharp.Data
“The F# Data library implements everything you need to access data in your F# applications and scripts. It implements F# type providers for working with structured file formats (CSV, HTML, JSON and XML) and for accessing the WorldBank data. It also includes helpers for parsing CSV, HTML and JSON files and for sending HTTP requests.” [project site]
One of the many interesting things in FSharp.Data’s build is that it uses Paket to retrieve the FSharp.TypeProviders.StarterPack. These files need to be included in any F# type provider project and Paket allows you to manage this easily.
Tags:
F#,
F-sharp Make
The current version of FAKE contains two tasks for Xamarins xpkg format. These are already used in Daniel Nauck’s Portable.Licensing project (read more about this project).
Sample usage:
Thank you Daniel for this contribution.
Tags:
F#,
F-sharp Make
Today I released two new AssemblyInfo tasks for FAKE and marked the old one as obsolete. One advantage of the new tasks is that they only generate the specified attributes and no more. There are already a lot of predefined attributes but it’s also possible to specify new ones. Here is a small example:
Tags:
F#,
F-sharp Make,
Fake
After a very interesting talk by Alexander Groß at the ADC2011 about MSpec I started to play around with it. I really like the concepts and especially the Selenium support.
Today I released a new “Fake – F# Make” version with initial support for machine.specifications (MSpec) and fixed some NuGet problems incl. support for automatic push to the http://nuget.org/ feed.
MSpec sample
Using MSpec in Fake is pretty straight forward and nearly the same like the NUnit or xUnit task:
NuGet sample
The following sample is taken from the NaturalSpec build and creates a NuGet package. It takes the AccessKey from the build params and pushes the new package to nuget.org. There are still some missing features but you can use them by manually editing the .nuspec file.
The corresponding .nuspec file looks like this:
Important links
Tags:
F#,
F-sharp Make,
MSpec
Today I released “FAKE – F# Make” version 1.40.5.0. This release fixes some issues with CruiseControl.NET compatibility and improves the MSBuild task.
Important links:
Changes for CruiseControl.NET
Daniel Nauck created a FAKE task for CC.Net. This task allows a much easier configuration of FAKE. Please download the latest CC.NET build if you want to use it.
Daniel also created a FAKE build project on his server which showed us some compatibility issues:
- In FAKE:
- Race condition in FAKE’s trace functionality
- Better XML tracing if something fails
- The tracing buffer will be flushed after every build target
- Every task has a Timeout property (Default: 5 min.)
- Setting of environment variables fixed
- Showing labels in NUnit is now the default
- In Docu:
- In CC.NET:
@Daniel: Thank you very much for helping me on this CruiseControl.NET stuff. I really appreciate this.
MSBuild task changes
The MSBuild task in FAKE gets a sequence of project files and compiles them in the given order. This might be slow if you have lots of dependent projects. Then MSBuild might analyze the dependencies over and over again. To fix this issue I currently see two possible solutions:
- Generate a temporary solution file and use this for compilation.
- Analyze the given projects and remove all dependent projects from the list.
FAKE 1.40.5.0 implements the second idea. If you have a better idea please contact me.
Tags:
docu,
F#,
F-sharp Make,
Fake
Yesterday I released “FAKE – F# Make” version 1.33.0. This release has lots of small bug fixes and a couple of new features.
Important links:
Git helpers -Fake.Git.dll
Git is a distributed revision control system with an emphasis on speed. Git was initially designed and developed by Linus Torvalds for Linux kernel development. Every Git working directory is a full-fledged repository with complete history and full revision tracking capabilities, not dependent on network access or a central server.
[Wikipedia]
In the last couple of months I worked on small helper library for controlling Git. This library is now released as part of “FAKE – F# Make”. You can find the source code at http://github.com/forki/FAKE/tree/master/src/app/Fake.Git/.
Features:
- Repository handling
- Submodules
- init, clone, information about submodules
- Branches
- checkout, create, delete, merge, rebase, tag, pull, push, reset, commit, …
- SHA1 calculation
Documentation generation with James Gregory’s docu tool
What’s a docu? A documentation generator for .Net that isn’t complicated, awkward, or difficult to use. Given an assembly and the XML that’s generated by Visual Studio, docu can produce an entire website of documentation with a single command.
[docu website]
Fake comes bundled with James Gregory’s documentations generator “docu”, which converts XML-Documentation comments into HTML files. All you need to do is downloading a template and calling the docu task inside your build script:
!+ (buildDir + "*.dll")
     |> Scan
     |> Docu (fun p ->
         {p with
             ToolPath = docuPath + "docu.exe"
             TemplatesPath = templatesSrcDir
             OutputPath = docsDir })
Since FAKE builds its own documentation with docu I started to add more (and hopefully better) XML doc comments. My plan is to describe more and more of the internal FAKE functions in the next releases. An updated HTML-document (generated via a docu task) can be found at http://www.navision-blog.de/fake/.
Side by side specification
For Test-driven development (TDD) it’s sometimes nice to have the specifications next to the implementation files since the specs are considered as documentation.
By using a tool like VSCommands it is possible to group the implementation with the specs (see also http://gist.github.com/457248).
This “side by side specification” makes TDD a lot easier but of course we don’t want to deploy the specification classes and the test data.
 |
==> |
 |
FAKE has a new feature which automatically removes all specification files and test framework references according to a given convention:
Target "BuildApp" (fun _ –>
      !+ @"src\app\**\*.csproj"
         |> Scan
         |> Seq.map (
             RemoveTestsFromProject
                 AllNUnitReferences      // a default references convention
                 AllSpecAndTestDataFiles // a default file convention
                 )
         |> MSBuildRelease buildDir "Build"
         |> Log "AppBuild-Output: "
)
The conventions are simple functions and can be customized e.g.:
/// All Spec.cs or Spec.fs files and all files containing TestData
let AllSpecAndTestDataFiles elementName (s:string) =
     s.EndsWith "Specs.cs" ||
       s.EndsWith "Specs.fs" ||
       (elementName = "Content" && s.Contains "TestData")
Miscellaneous
- SQL Server helpers are moved to Fake.SQL.dll
- Additional functions for attaching and detaching databases.
- FileHelper.CopyCached function was added
- Copies the files from a cache folder. If the files are not cached or the original files have a different write time the cache will be refreshed.
- EnvironmentHelper.environVarOrDefault added
- Retrieves the environment variable or a given default.
- Fixed Issue 3: toRelativePath calculates paths with ..\..\ if needed
- Added a build time report to the build output.
- XPathReplace and XMLPoke tasks added.
- Replaces text in an XML file at the location specified by an XPath expression.
- ILMerge task added
- Windows Installer XML (WiX) task added
Tags:
F#,
F-sharp Make,
Fake,
git,
SideBySideSpecification,
SQL Server,
TDD,
xml,
XPath
Today I released a new bugfix release for “FAKE – F# Make”. We fixed some path and logging issues and as a new feature we introduced the @@ operator which allows to combine paths.
Tags:
F#,
F#,
F-sharp Make


